Tuesday, February 18, 2014

My Fridge and Salad Bar in a Box :)

My mom-in-law (thanks Linda!) posted a YouTube video on Facebook about a day ago...and now I'm hooked!  Let me explain.  This video showed how to make a "Salad Bar in a Box" to store in your fridge, so it would be easy to grab something healthy with little time and effort throughout the week.  This box of fresh chopped veggies, nuts, beans, or practically anything you want can become not just a salad, but also fillings for wraps, pitas, and sandwiches, or the beginnings of a tasty stir-fry.  Because everything is already washed and chopped, you just open the box and you have lunch or dinner practically made!

So I shared the link on Facebook and my friend Cheryl beat me to Walmart and had pics posted as well, and because of her excitement I decided I couldn't wait and had to go get my own box :) --the cashier even commented that another lady had purchased the same boxes yesterday--haha!  Then, this evening Cheryl told me that while in Walmart she found someone else buying these same boxes! It's contagious!

When I got home with my boxes and some new fresh veggies, I realized my refrigerator could use a clean-out...so the big project began and before long I had an empty fridge and a counter full of all sorts of leftovers, veggies, juices, milks, and mystery containers of ?????!!!!  Once emptied and cleaned...I managed to fit everything back in, better organized and still had space to put in the new "Salad Bar Box"

Cleaned and re-organized.

With the "Salad Bar Box"

This is what the inside of my Salad Bar Box looks like.
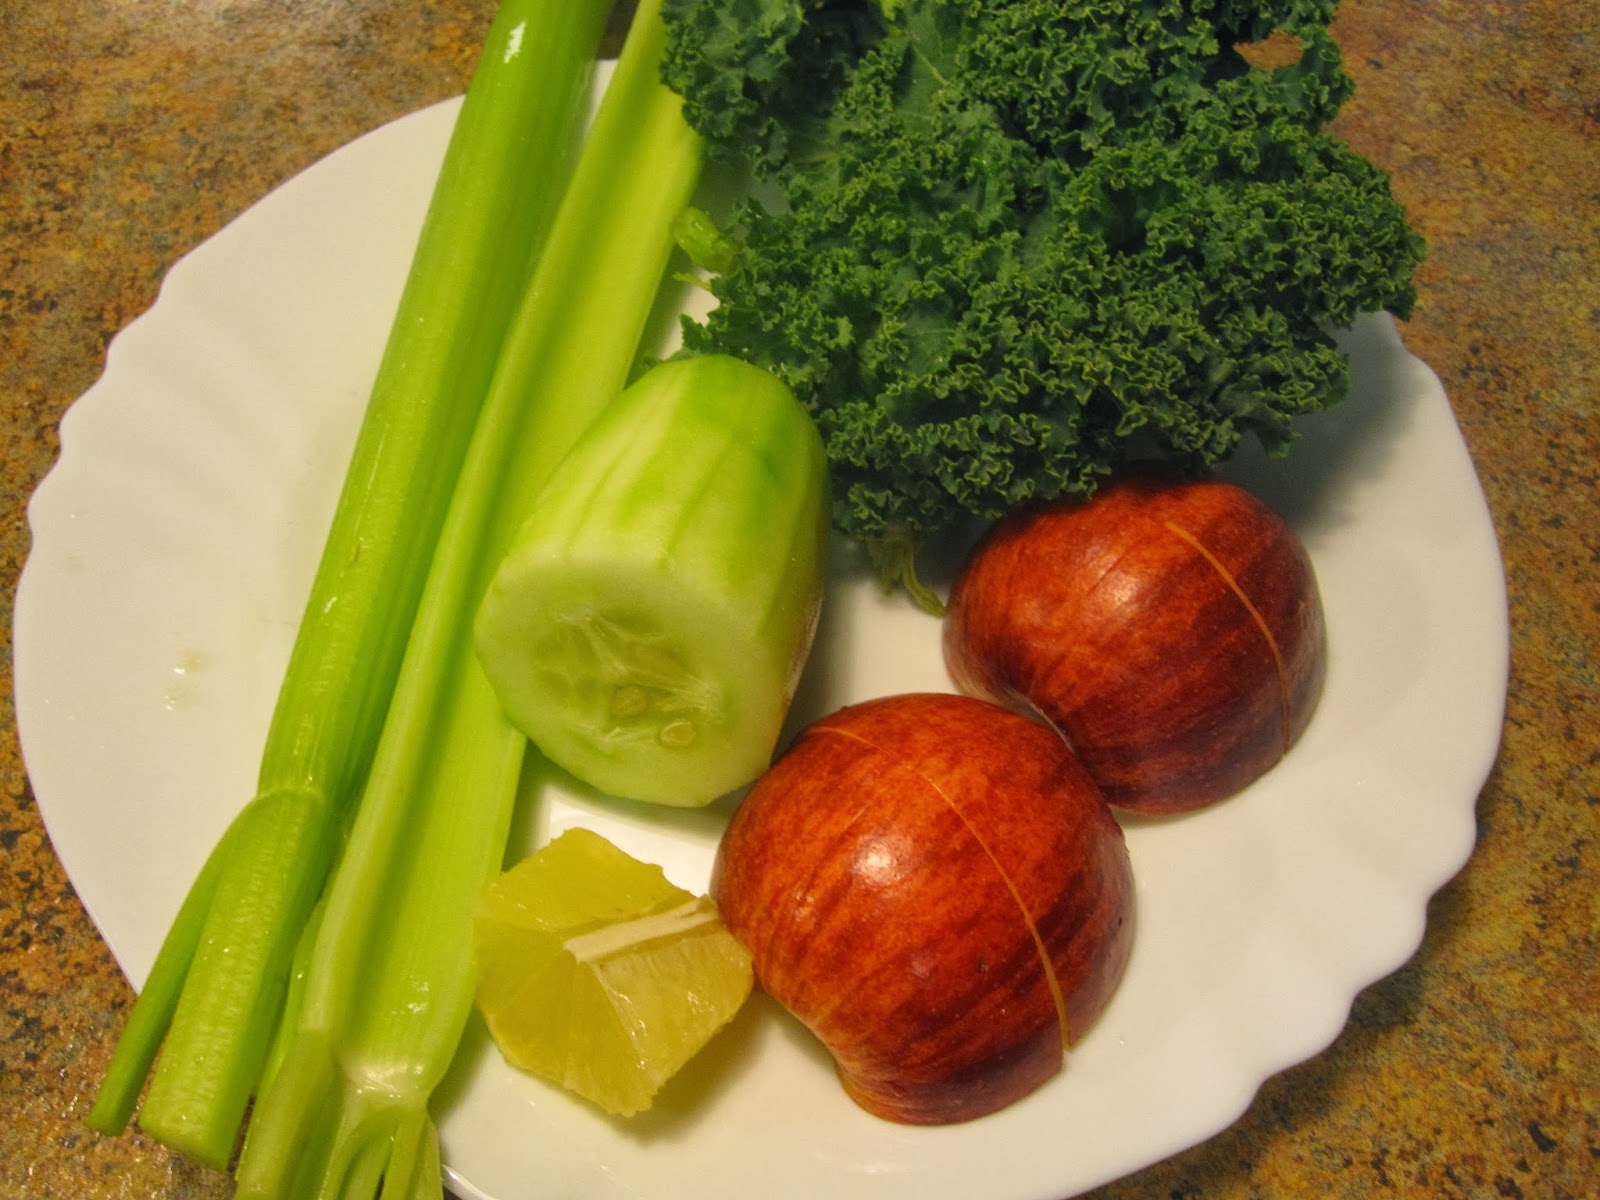
Multi-colored bell peppers, broccoli, shredded carrots, cherry tomatoes, corn, nuts, cucumbers, shredded radishes, chopped celery, romaine lettuce mix, and baby kale salad mix.

Tomorrow I plan to season up some veggie "chik'n" strips, and maybe some meatless taco filling to use along with all these pretty veggies :)

For those looking for more ideas of what to put in the box...here is a list.

Cauliflower
Snap/Snow peas
Water chestnuts
Shredded green or  purple cabbage
Peas/Beans
Olives (ick)
Raisins (ick)
Fresh grapes/berries/mandarin oranges (surprisingly good in salads)
Kale/Chard/any other leafy greens
Alfalfa Sprouts
Bean Sprouts
Onion
Mushrooms

You can be creative and use anything you and your family like in your salads, sandwiches, and stir-fry.  The idea is to take time on a day that works for you and wash and chop everything to make those days you have less time, easier and healthier :)  

After School Snack

Everyone is back to school now! Or at least until the next snow day.

My snacks are not always this involved or time consuming, but I was enjoying some "down time" in the kitchen.

We have mini "chik'n burgers", veggies and dip, and some organic gelatin-free gummies, with chocolate almond milk.

So I started with...
A nice whole grain bread :)

Used a very small glass to cut "buns" the size of chik'n nuggets.

Brushed with some melted Earth Balance spread.

Toasted on a hot griddle.

My favorite meatless chik'n nuggets...

Warmed and browned in a "green pan" with a little bit of Earth Balance.

In the meantime, I cut out some veggie cheese and lettuce circles.

Assembled...

The veggie sticks and dip...

The easiest part of this snack ;)
 

And here we go...all ready for my kiddos.


Friday, February 14, 2014

Happy Valentine's Day!!

Happy Valentine's Day Everyone!

I was ambitious this morning and made some
heart shaped pancakes with some yummy toppings.

The pancake recipe:
1 cup unbleached white flour
1 cup whole wheat flour
2 T. baking powder
1 t. salt
1/4 C. sugar
1 t. cinnamon
2 C soy/almond milk

Mix it all up :)

I used this cool little bottle to "draw" the pancakes on my hot griddle.


First the large hearts.

Hard to get them evenly "tan" when you draw them.

Next, little hearts for the kiddos.

First little one off the griddle...

And kisses and hugs...


My plate BEFORE the yummy toppings...

Strawberries, Bananas, Pecans, Whip Cream and a drizzle of syrup.

Up close yummy-ness :)

And, yes...I ate it all!


Juicing, Part 2

This was from a day ago when I was testing these two recipes for a demonstration next Sunday.  Needed to "taste-test" them.

First up "Sweet Greens" (from: Kris Carr "Crazy Sexy Juices and Succulent Smoothies")

I cut the recipe in 1/2  (since it was a taste-test)--the recipe below is the original full version

4 Granny Smith apples, 3 cucumbers (peeled), 5 kale leaves, 8 romaine leaves,1 1/2 C. spinach


All chopped up for the juicer.


This was also a very pretty green color...
And the 1/2 recipe yielded about 8oz. of juice


My opinions...I didn't like this one as much as my last juice post...I think the romaine gave it a strange taste? It wasn't nearly as sweet, and it's possible the Granny Smith apples threw it off for me...just not sweet enough.  Granny Smith are my least favorite apple.  For the name "Sweet Greens" I wasn't impressed with the "sweetness".

Next up: Beet, Apple, Pear, Ginger

This one I followed the full recipe (using 1 golden apple and 1/2 granny instead of 1 1/2 grannys) and got about 1 1/2 cups of juice.

1 Lg beet peeled, 1 golden apple, 1/2 granny smith apple, 1 1/2 pears, and 1" fresh ginger root( I used about half)

This was a VERY bright colored juice :)


My opinion?  It was pretty tasty and my friend, Sara, also liked it.  It did have a "beet" flavor, but no after-taste, and was quite sweet.


Juicing

I have had this juicer for years...used it a few times, but not nearly enough. (It still looks brand new.)  This one in particular is a masticating juicer (thanks Cheryl--I went home and looked up the differences).


What does that mean?

Masticating Juicers / Single Gear / Single Auger Juicers use a single gear or auger that literally chews fruit and vegetable fibers and breaks up the plant cells, resulting in more fiber, enzymes, vitamins and trace minerals. Masticating juicers are generally more efficient than Centrifugal juicers because they can extract more juice from the same amount of food (i.e. the pulp comes out drier). Masticating juicers are very capable at juicing virtually any fruit and vegetable, and single gear juicers will also extract juice from leaves and grasses, like wheatgrass, spinach, lettuce, parsley, and other leafy greens and herbs. (Note: the Champion Juicers are the exception and do not juice wheatgrass or greens very well).

Another benefit of masticating juicers is that they operate at slower speeds (RPMs) than centrifugal juicers, resulting in less foam and heat, which means more nutrition in your glass. The low speed also increases the shelf life of the juice so that you can generally store your juicer for a few days. Masticating juicers are also more versatile than centrifugal juicers because, in addition to extracting juices, these juicers also homogenize foods to make baby foods, pates, sauces, nut butters, banana ice creams and fruit sorbets. Some of these juicers can even extrude pasta and make bread sticks and rice cakes!    
http://www.harvestessentials.com/whatjuicisri.html


My first juice was just some combination of several web recipes I found...and used what I had in the fridge.

2 stalks of celery, 4 Kale leaves, 1 apple, 1/3 cucumber, 1/4 lemon, and 1/2 pear (not pictured)


The result was a really pretty green juice.
The kids didn't like the "celery" taste, but I found it uniquely tasty, with the right "sweetness" :)


Saturday, February 8, 2014

Thank you "Nerdy Nummies" part 2

Check this girl out, she is super creative, and the inspiration for this baking session :)

https://www.youtube.com/playlist?list=PLABDF3052CBF1B195

"Smart Cookies"

I used my vegan chocolate chip cookie recipe, black cookie frosting, and white frosting.

She has a great template on her youtube, so it's just trace and wait for it to dry--which by the way she is right, it takes about 4 hours + to dry enough that you can lift them and transfer to the cookies.

Cookies with strategically placed chocolate chips...

Finished :)


Thank you "Nerdy Nummies" (Minion Cupcakes)

Last night was a fun night.  Thanks to Bryon, Madison, and the cutie at "Nerdy Nummies", I was inspired to do a little "for fun" baking.  And the results were cute and delicious :)

First up was Minion cupcakes...I used my good old standard vegan chocolate cupcake recipe, and little debbie "cloud cakes" (since twinkies have beef fat in them), blue frosting, and black cookie icing, and some premade candy eyes.

Ready to make cupcakes :)

Baked and cooling.
 
The first "practice" minion head.
 
Not too shabby for my first one :)

One of my little guys requested a "one eyed" Minion.

Minion heads :)

Group PHOTOS!!


Close up...


Close ups after the cookie frosting dried.